
Installation walkthrough of Mandriva Linux 2008.0
Related links
Older installation walkthroughs:
Mandriva Linux 2007.1 Spring
Mandriva Linux 2006
Mandriva Linux 2006 Limited Edition
Mandrakelinux 10.0 Community Edition
Mandrakelinux 9.2
Mandrakelinux 9.1
Site news
Latest site additions:
Updated January 13rd 2008:
My LIRC page: The Linux Audio Server Project - Revisited
Added January 3rd 2008:
My (K/X/)Ubuntu review: Ubuntu - beyond the hype
Added December 2nd 2007:
My Mandriva 2008.0 review
Added November 20th 2007:
The configuration page of Mandriva Linux 2008.0
Added November 18th 2007:
The Installation walkthrough of Mandriva Linux 2008.0
Added November 17th 2007:
The review of openSUSE 10.3
Added July 8th 2007:
The Configuration page of Mandriva Linux 2007.1 Spring
Added July 1st 2007:
The Installation walkthrough of Mandriva Linux 2007.1 Spring
Added December 18th 2005:
The third and final part of my Mandriva Linux 2006 review
Added November 14th 2005:
The second part of my Mandriva Linux 2006 review
Added November 6th 2005:
The first part of my Mandriva Linux 2006 review
For older additions please see the articles page.
This page describes the installation I did with the free and freely available download dvd of Mandriva Linux 2007.1. I have installed it and run it on my laptop (madeira) (see also the hardware specifications page).
To those who've already used or seen a graphical Linux installer this may not be exciting, but those who haven't and are curious are invited to give this page a good read. I hope that this information will help some uninitiated to take the plunge and give Linux a try.
I used 'use existing partitions' and 'install' instead of upgrade. As has been the case since years, it seems that in most cases 'upgrade' works fine, but in some it doesn't. Your mileage may vary; if you use the 'upgrade' function and you have problems, you may first want to do a clean install to see if that helps. BTW, a clean install is usually much faster anyway, since there are no dependencies of the packages that get replaced to be checked.
Note: whenever upgrading doesn't work, it's because some essential thing has been changed in the inner workings of the system. This can be fixed if you know how, but in that case you'd not likely be reading these pages...
I did an installation on my older laptop where I did do some disk partitioning, so there are some shots of that as well. I still think that DiskDrake, the Mandriva disk partitioning tool (which is also available after installation from the Mandriva Control Center), is one of the best partitioning tools around.
I have several partitions that I use as root partitions so that I can multiboot different systems; I now have one GRUB bootloader in the MBR (master boot record) which is set to chainload any of the 3 system (root or '/' ) partitions that I have prepared on my harddrive, and the system that it comes with itself. The bootloader of each new installation then goes into the start of the partition that I put that system on.
I used the standard method of installing by means of the downloadable dvd this time. There's also a boot image that supports lots of installation methods: FTP, HTTP, NFS, local harddrive image, local harddrive files. I have used that method for 2008.0 on my desktop system 'zurich', using the local iso image. Apart from the slightly different way to start the installer, there's no big difference, it would have resulted in practically the same screenshots.
A last remark: it will pay off later if you create an extra partition that can serve as root partition for subsequent linux installations, for instance for beta/rc testing.
It seems I cannot stress this enough; read the forums, there are still so many posts of people who go like: "I wish I hadn't given up my nice installation of Distro X to try out Distro Y which I now find is totally disappointing to me.." but usually with stronger wordings...
As I wrote before, on my laptop I have 4 such partitions, and currently I have Mandriva 2007.1 Spring x86-64, Mandriva 2007.1 Spring i586 and openSUSE 10.3 x86-64 alongside the Mandriva Powerpack 2008.0 64 bit edition that is now my main system.
The installation itself
Just put the dvd or the first cd in the tray and reboot the pc; then type enter when you get to the question if you want to install, upgrade or other.
I will now just give some tips and explanations on what and how I do things, along with the screenshots I made during the install on my laptop (just hit F2 to make a screenshot, you can find them later in /root/DrakX-screenshots/). Note that I have chosen to resize the screenshots, the normal resolution is 800x600 (SVGA). You can click each image to get the normal size screenshot.
The following parts are in the installation; I've intermittently put my comments, whereever I have tips to spare.
Choosing Your Language
|
Use multi-languages to select more than one language. Very important if you want multiple languages, in some cases it can be near impossible to add later (well you can always run through the install process again, just doing upgrade instead of install...). Selecting extra languages means you also get the spell checker files for those languages installed. Since Mandriva 2008 there's a tool that will help you easily add other languages after installation, but if you're doing a full installation it's best to get things right immediately. Linux offers an astounding choice of languages (any language that anyone has bothered to do the translation for, as a matter of fact). I checked the secondary languages of my choice and moved on. | 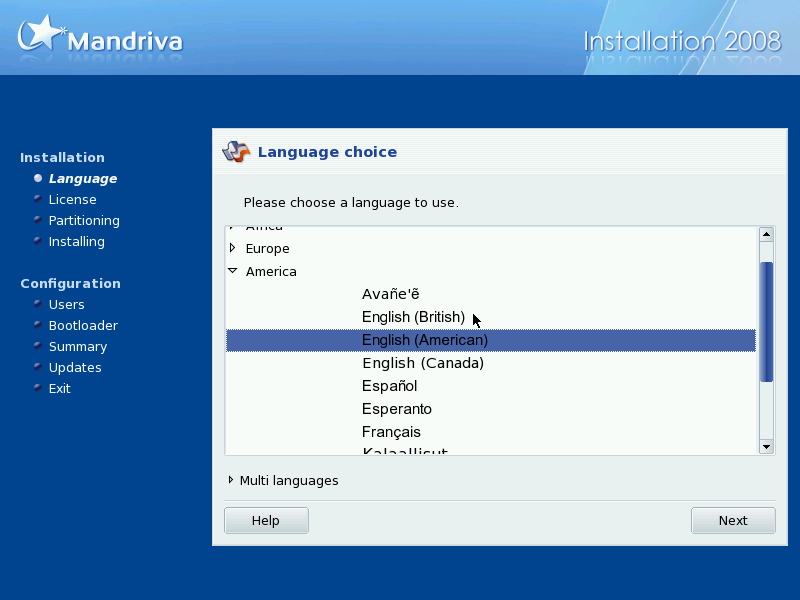 |
License Terms of the Distribution
| License agreement - nothing objectionable here, no EULA's that try to take your rights, quite the contrary. This is the only License you'll see and/or have to agree to. |  |
Install type
|
Here the question is asked is whether you want to install or upgrade; even if you have an older version of Mandriva installed, it is often wiser to do an install than an upgrade. People have reported problems with the result in case of an upgrade from some older Mandriva installation. In any case, a clean install is usually much faster. Remember, as long as you don't format your /home partition (which is a separate partition, right?!) you keep your own data; the install vs upgrade question is only related to the system. As you can see, all 4 of my current installations are properly recognised. The installer proposes to upgrade any of them, but I selected 'Install'. | 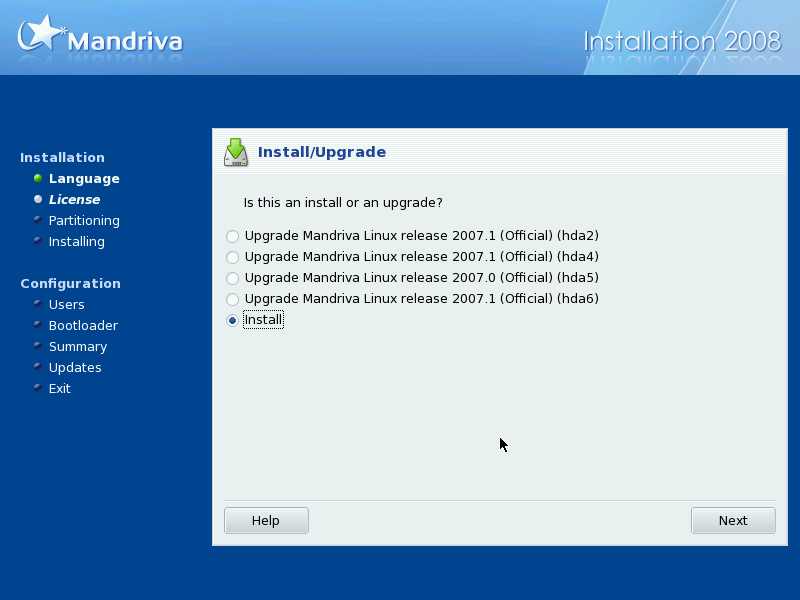 |
Keyboard selection
| Select your keyboard layout. (Tip for Dutch users: you can choose the Dutch layout, but this is actually very uncommon; the commonly used keyboard layout in the Netherlands is US international.) I got the British layout preselected, since I chose British English as the first language. I chose US International. Basically you get all options that are relevant to the languages you selected in the beginning - naturally you can get all other layouts by clicking the 'more'-button. | 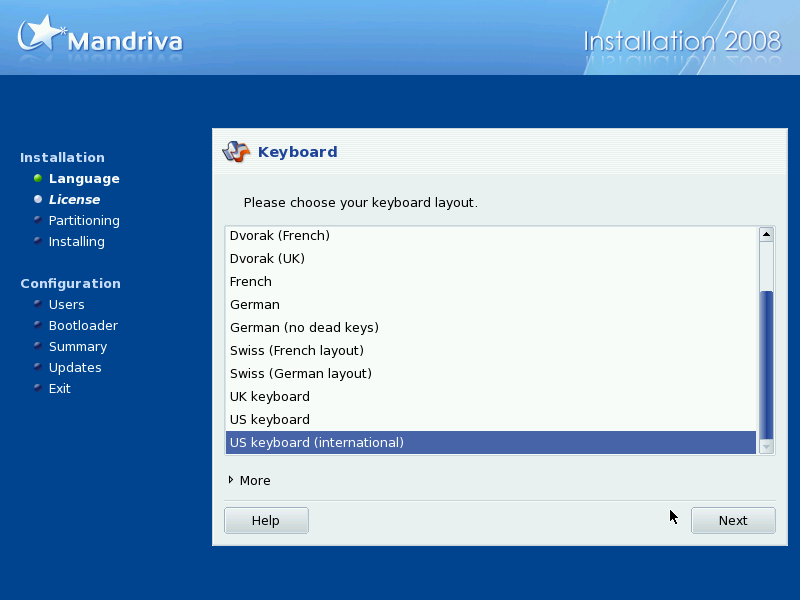 |
Hard disk partioning
|
Select whether you want to use the free space on the hard drive, use existing partitions, erase the entire disk, reduce the size of your windows partition to make place for your Linux system or do your own custom setup. BTW this screenshot doesn't show the option to use the free space on the hard drive, since there my hard drive was completely partitioned, nor the option to reduce the size of my windows partition since I don't have any windows partitions. In case you do have Windows partitions, and your whole drive is partitioned so you can't use free (unpartitioned) space, DiskDrake can resize the Windows partition. However, sometimes there's data at the end of a partition, and in the case of NTFS partitions (Win2k and WinXP standard partition types), this data cannot be moved by DiskDrake. So you will have to boot into Windows, run a defragmenter, until there's enough space at the end of the partition to shave off enough for your Linux system. Note that some defragmenters for whatever reason, leave some data somewhere toward the end of the partition. Once I had to defrag, run the linux installer with DiskDrake (no live cd at hand at that moment), resize as much as possible, boot to windows again and defrag again, to have some more free GBytes at the end, etc... until there was the desired amount of space available for the required Linux partitions. Currently, I recommend to make root (system) partitions between 6 and 10GB - rather more (8 to 10GB) if you intend to install a 64 bit system, you may have to have quite some duplicate libs; if you know you're not going to install loads of software, 4 to 5GB may well be enough. But with the current sizes of hard drives, even in laptops, why would you try to save a GB or two? Better safe than sorry. It also depends on whether you want to copy the installation media to your hard drive - see the Installation media copy-step below. In any case, I double making your root partition larger than 15GB is useful. For more comments on disk partitioning, read my Mandrake 9.1 installation page. As always, I really recommend to create a spare partition (at least one - as you can see, I have four partitions that I can use as a system or 'root' partition, so I can multi boot 4 different systems) that can later be used as root partition to an alternative system. With harddrives of 120GB and more (even on laptops - I have a 160GB drive) being todays standard, some extra 10GB that lies unused 'just for when you want to use it' is not an issue, whereas throwing out your working system for some new hyped system that happens to be 'not all that' in your specific case is a real shame. |  |
| I chose 'existing partitions' during this installation, and I indicated which partition I wanted to use as a root partition ( / ) for this installation, and where to mount the other 'root' partitions. |  |
| As a side note, just some screenshots to show you what the partitioning wizard DiskDrake looks like, here are some images from another Mandriva 2008 installation. As you can see, the options are somewhat different due to a different state of that harddrive. I chose to use 'Custom disk partitioning'. |  |
|
In this screenshot, you can see that the drive is already partitioned and 4.5 GB in size. This drive was given to me and it has housed a Linux system before. Note: if you want to use your swap to hibernate/suspend your system, put it as much to the beginning of the drive as possible. I have tried out a swap partition towards the end of the drive, and the whole hibernating/thawing is much much slower! |  |
| After clicking the first partition and selecting the option 'mount point' it's possible to define the mount point of that partition. The partition mounted as / (root) will be used for the system. | 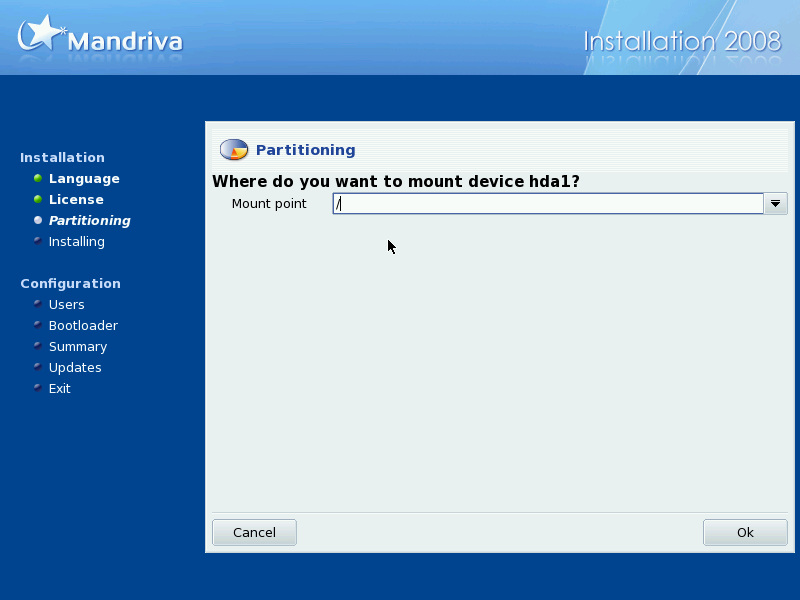 |
| Here I chose to mount the 3rd partition as /home so it will be used as the user data partition. For an example of the use of DiskDrake with partition modifications during the Mandriva installation, please have a look at my Mandriva 2007.1 Installation Walkthrough. | 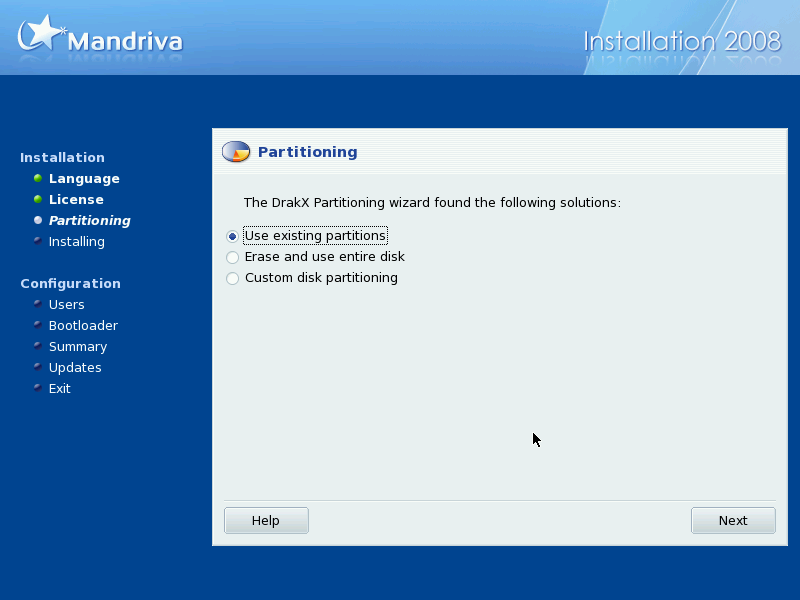 |
Formatting of partitions
| Back to the screenshots of Mandriva 2008; the next step is to format the partition that will serve as root partition. The system will normally want to format all newly created partitions. After this, there is no way back, so be sure that you have made backups of any file on that partition that you may need. If you wish, you can choose to format other partitions as well; in my case I wanted to keep all data on all other partitions. | 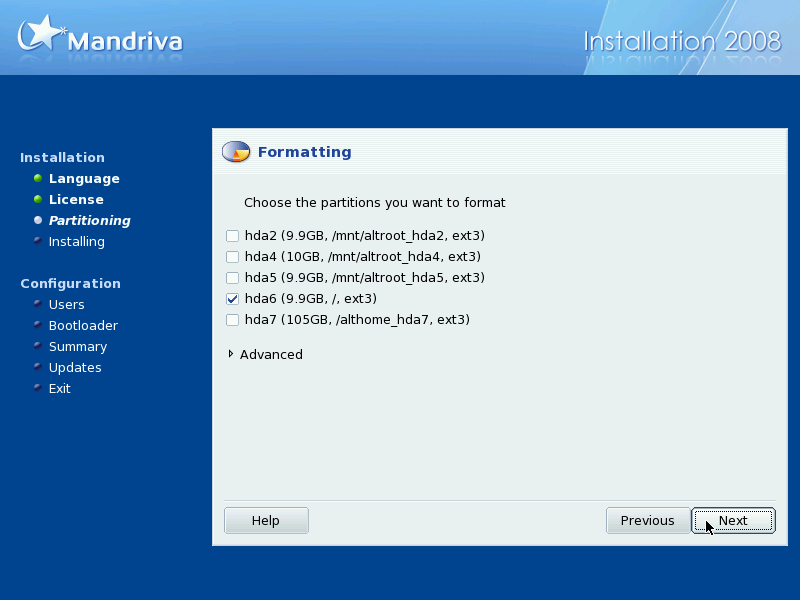 |
Installation media copy
| The installation media can be copied to the hard drive, in which case you can keep installing software packages without having to scramble for the dvd. This may also be convenient in case you just borrowed a dvd from someone. I chose not to, since I will set up the system to download packages from the web repositories anyway. | 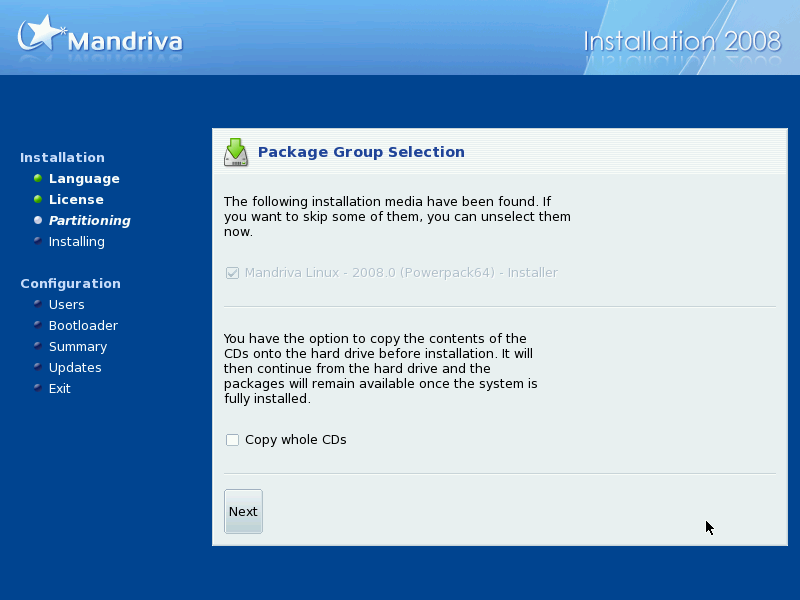 |
Supplementary installation media
| This dialog allows you to indicate which other media sources you have. I didn't set this up during installation. | 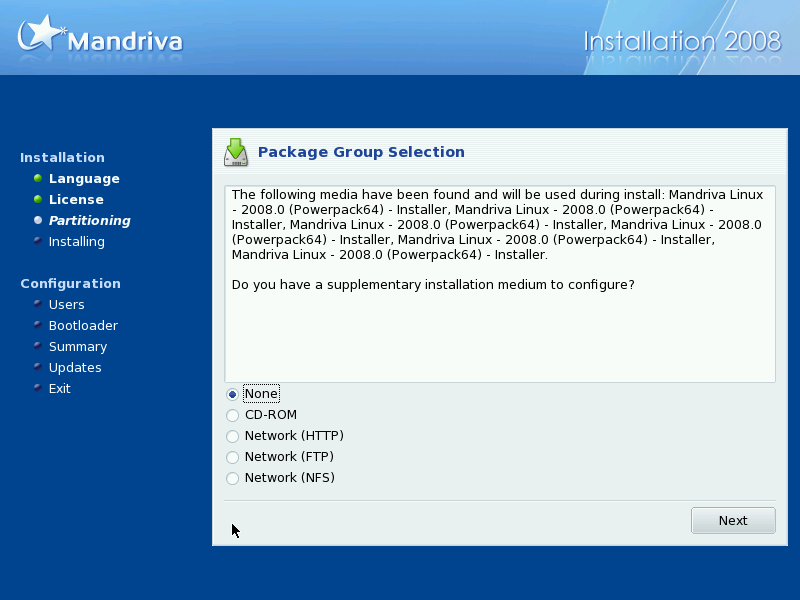 |
Package Group Selection
| New since Mandriva 2008.0 is this section of the installer, which allows you to quickly and simply install either a KDE or a GNOME desktop system. If you choose "Custom install", you still get the 'old' package installation dialogs. | 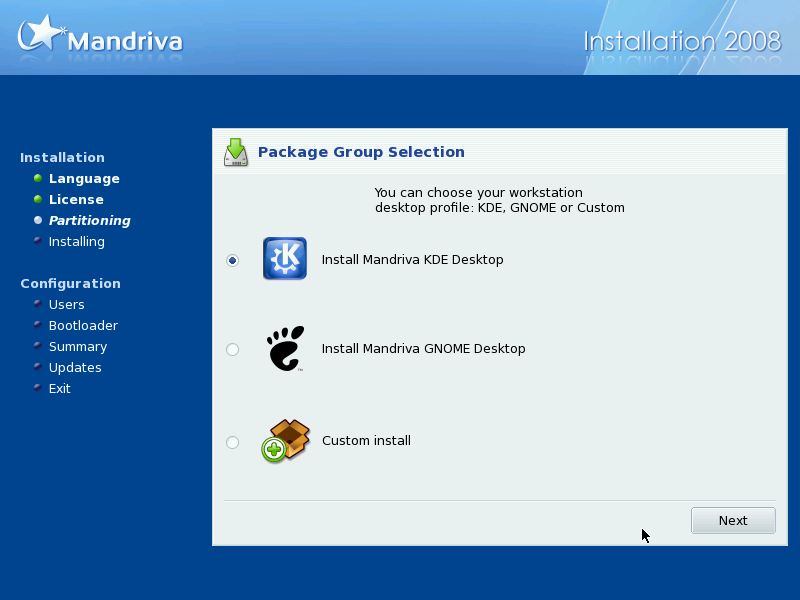 |
| This screenshot is again one from the other installation, just to show you what you get if you should choose 'Custom install'. There's also an option for the individual package selection, which you can read about in my older installation walkthroughs. | 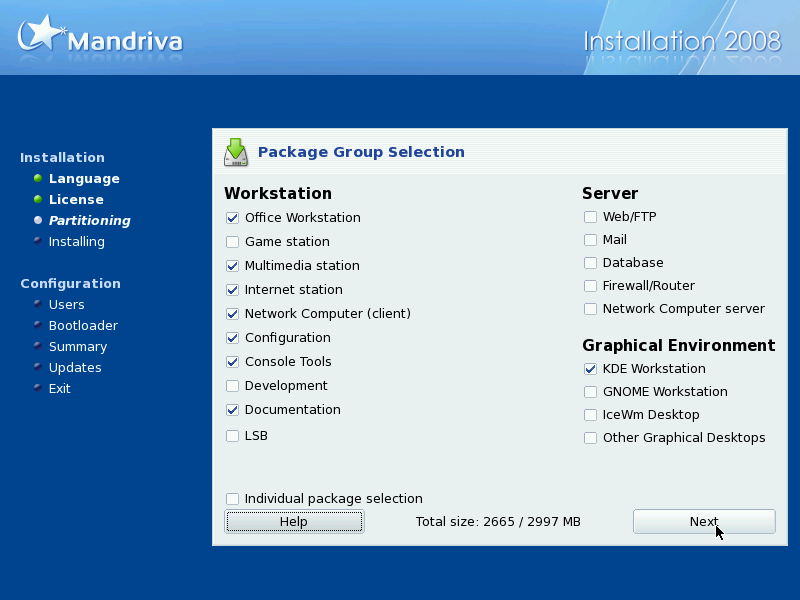 |
System installation
| Here the system gets installed, and the looks of this part have really improved lately. It's a bit like a slideshow of things to come, features of the system. | 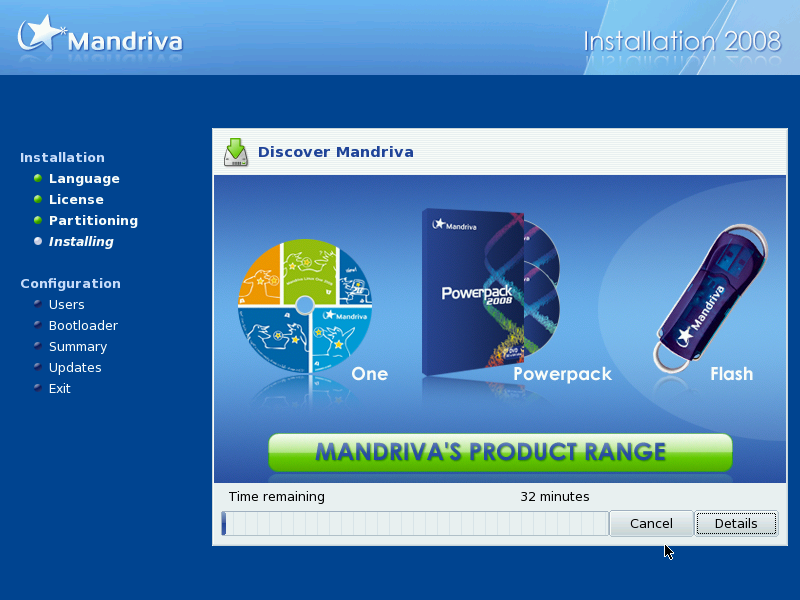 |
| Here the system gets installed, and the looks of this part have really improved lately. It's a bit like a slideshow of things to come, features of the system. | 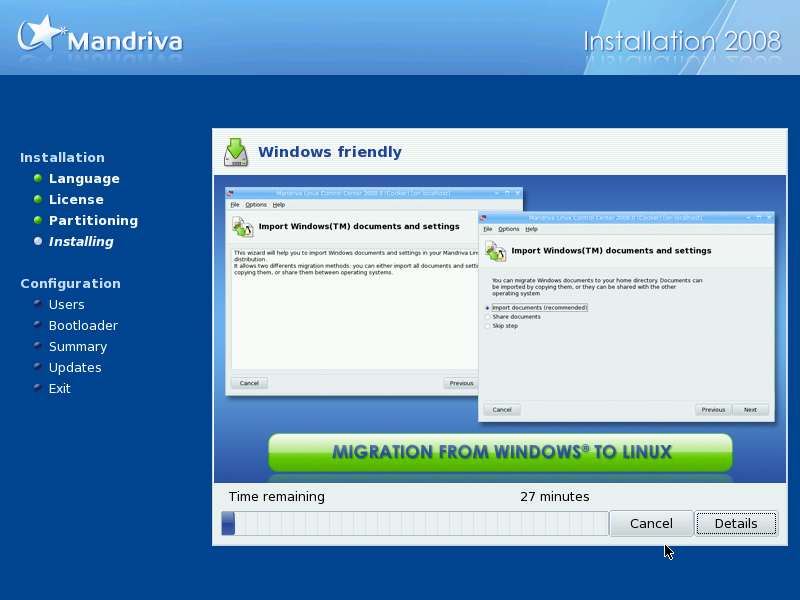 |
| Here the system gets installed, and the looks of this part have really improved lately. It's a bit like a slideshow of things to come, features of the system. | 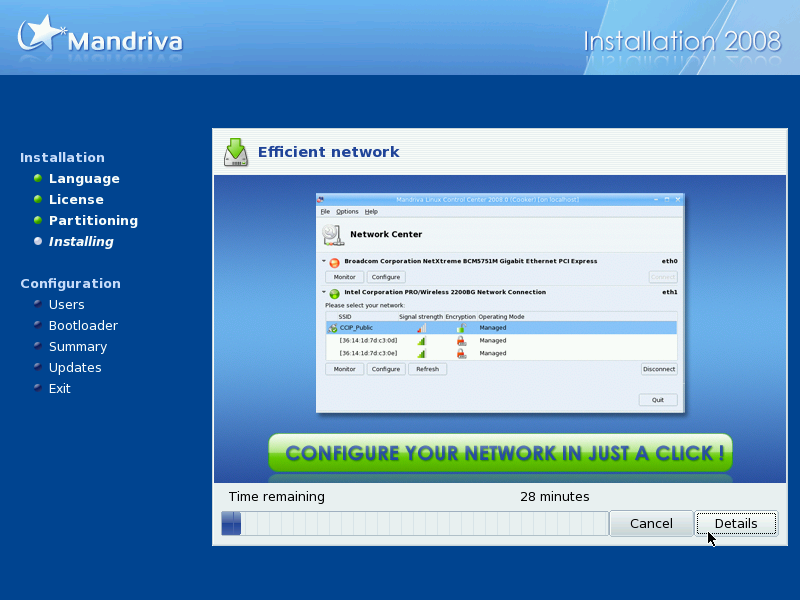 |
| Here the system gets installed, and the looks of this part have really improved lately. It's a bit like a slideshow of things to come, features of the system. | 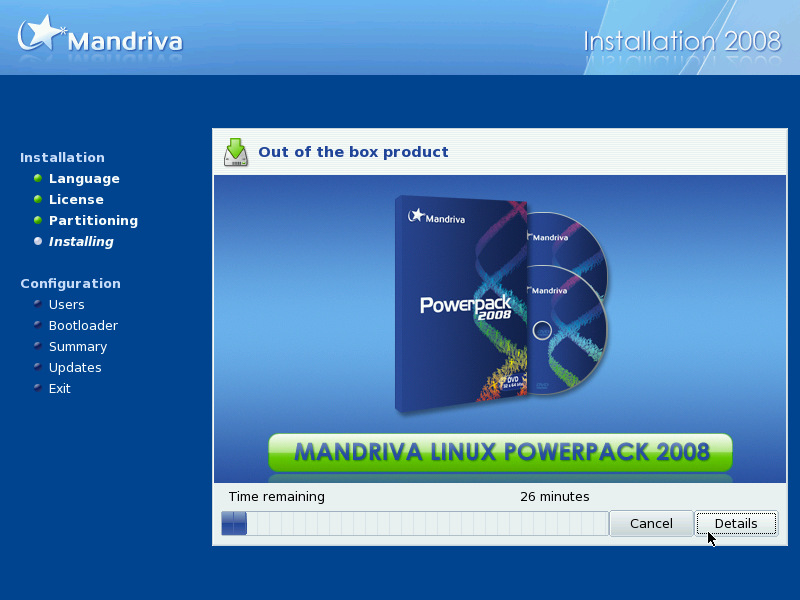 |
| If you click 'Details' you see the list of packages that are being installed; previously each package had it's own progress bar and there was only one name. The new details list (since Mandriva 2007.0) looks a lot more like the one Suse Linux uses, and I like it much better. | 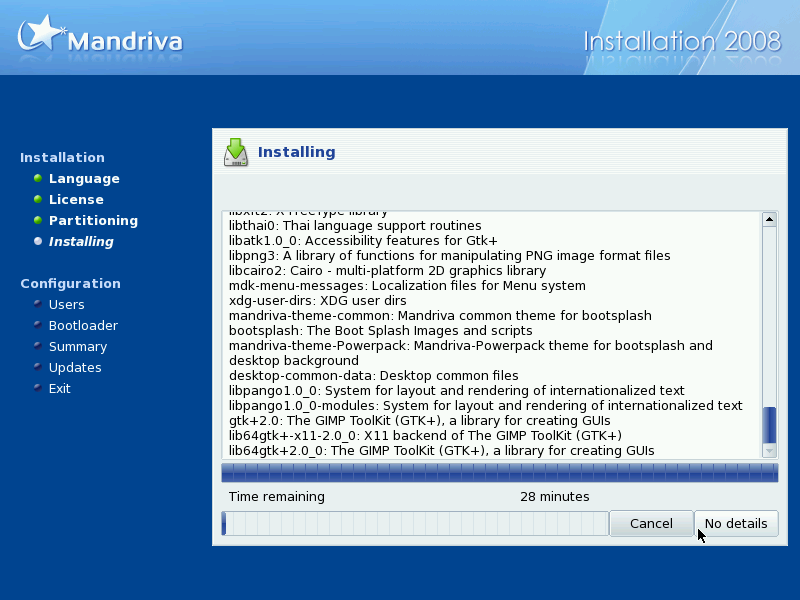 |
Setting the administrator (root) password and add user
| This dialog is a big change from before; there used to be separate dialogs for the root password and the user account creation. Since Mandriva 2008 these have been partially combined: you have to set the root password here and create one user. Choose a password that you can remember, but bear in mind: anyone with physical access to your machine can easily change it (not necessarily find out what your password is, but set a new one. See the howto page on how to do that). For the other user accounts you may want to create, there is an option in the summary at the end. | 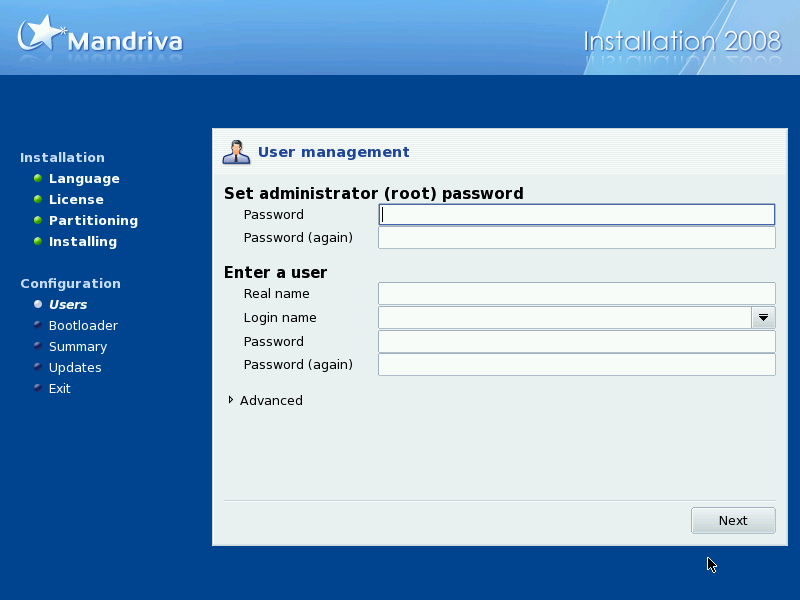 |
Boot loader
| The bootloader serves to let you choose between the Operating Systems on your machine at boot time. You can have the bootloader at the various locations that are selectable here. Note that it only makes sense to put the bootloader in the first sector of the root partition if you have some other bootloader to direct the computer BIOS there. If you choose 'skip' you won't be able to start your system (unless you have another way to start your new system), and even the rescue mode of the installation cd won't be able to help you; it relies on the bootloader info being available somewhere on your system, and if you choose 'skip' here, it won't even get created. Another thing: the title is clearly LILO/grub installation - but since Mandriva 2007.1 Spring, the default is GRUB, and there's no way to choose LILO at this point. | |
Summary and configuration
| This is the summary screen; you can (re)configure various items in the following subdivisions: System, Hardware, Network & Internet and Security. I added some users in 'user management'. | 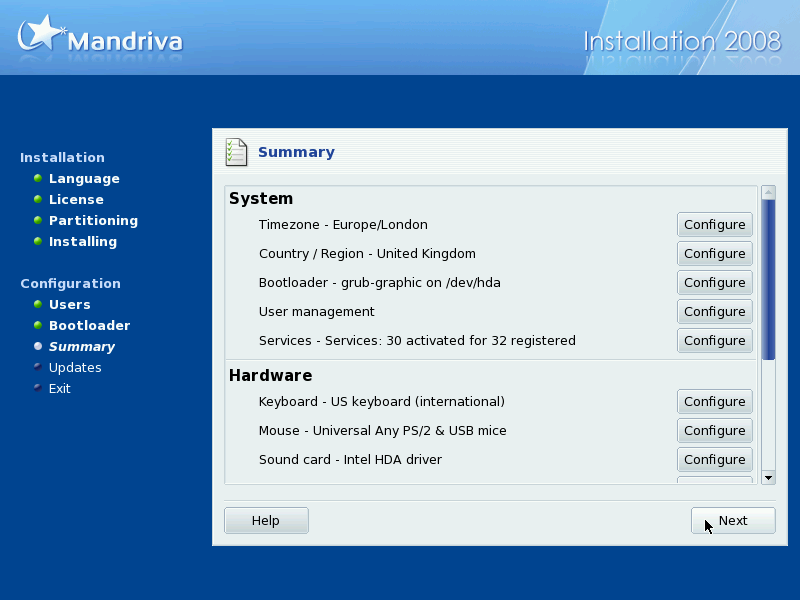 |
| Scrolling down shows the remaining things to configure. Note that I left the graphics setup to automatic setup. |  |
Summary -- Country and Region
| Here you can choose your location - I had to fix this since the main language I chose is British English, and so the system presumed London, England as location. | 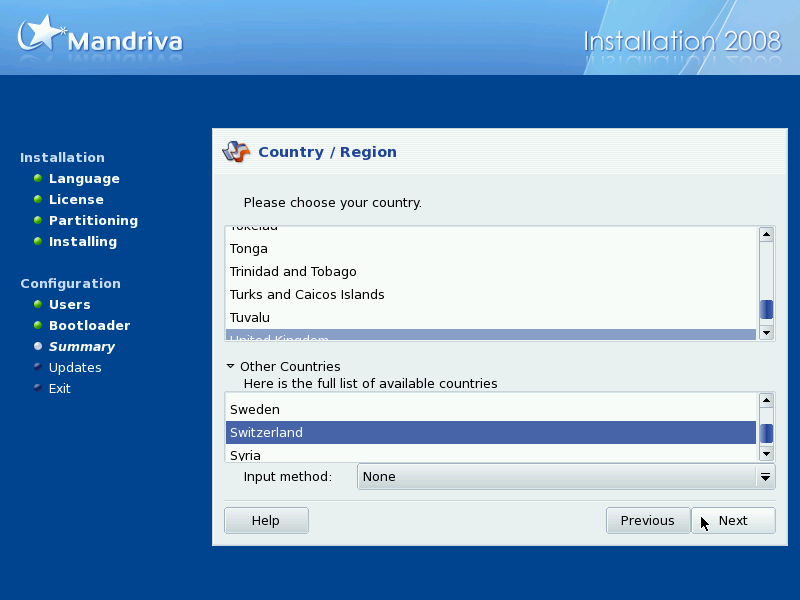 |
Summary -- Security Level
| I realised the security settings were 'high' but since this machine won't be a server and mostly connected to the internet via a firewall (paris), I wanted to set the security to 'normal' which has some more lax settings (amongst other things, you don't need to change the root password every so many months and such...). | 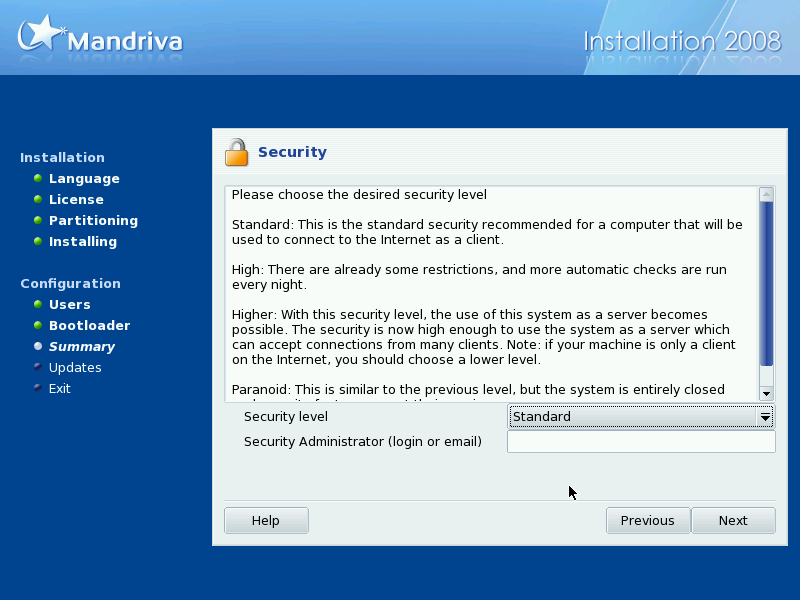 |
Summary -- Firewall
| I also had a look into the firewall settings; there are checkboxes for the standard services, and a text box for personalised ports. | 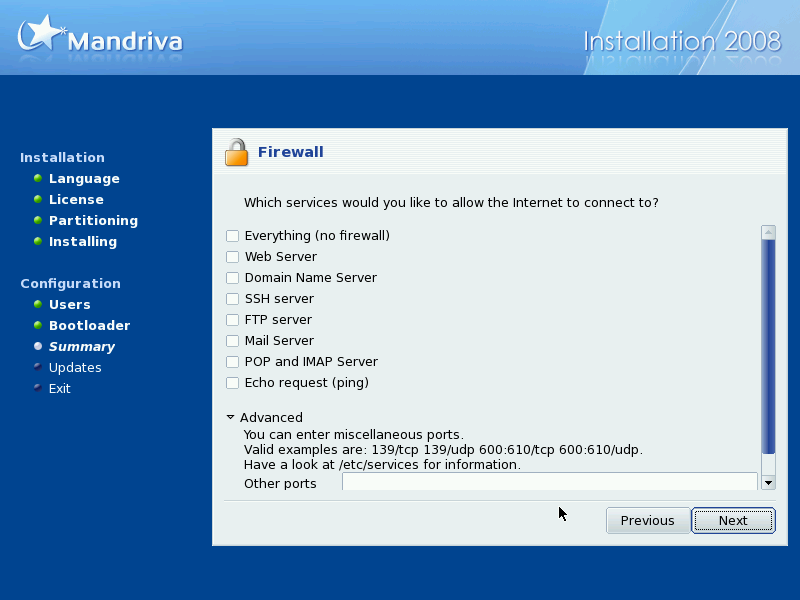 |
| Then there's the interactive firewall settings dialog, which allows the user to have direct popup boxes in case of some undesired connection attempts. |  |
| Finally one can choose which network interfaces should be protected. | 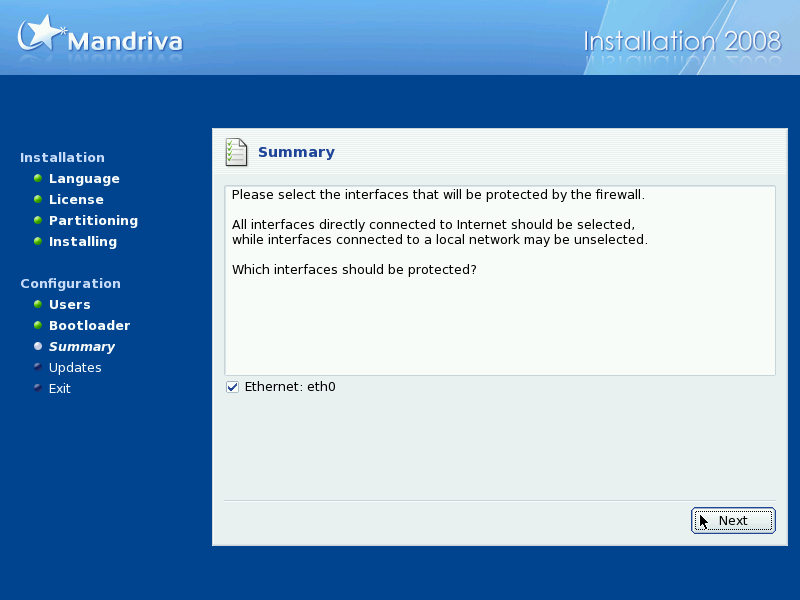 |
Install updates
| Before ending the install, you get to install the updates that have been released after the install cds hit the web. Figuring this was just after the release, I declined. If you get installation media a few weeks or more after release, this is really a nice feature. |  |
End of installation
| Done! It took about half an hour, not bad for a full system install (don't compare this to the 10 minutes or so a Live CD install may take, that's not a 'true' system installation, but merely a copy from disk to hard drive). Of course I had taken the shortcut of installing a KDE system, also jumping individual package selection which I used to go through. |  |
Final remarks
The installation was short, problem free and straightforward, as it has been since quite a while. The first boot screen of the installation disc looks much more polished than before, nice graphics and slick blending in of the Mandriva name. But more importantly, the installation disc holds some useful options - alongside the common 'repair system' there's also an option to run a hardware RAM memory test (memtest86), and the installation setup has more features and a clearer help/info system.
There were some notable changes apart from the improved looks; now, as many other distributions, Mandriva comes with GRUB as a default bootloader, and the printer configuration has been taken out of the installation process.
Compared to the Mandriva 2007.1 Spring edition, 2008 has been polished a slight bit, and especially due to the KDE/GNOME/Custom Package Group installation dialog a whole lot simpler and faster, whilst keeping all options open for power users.
All in all, the installation of Mandriva 2008 is again a step up from the already fine Mandriva 2007.1 Spring edition.
Happy installing!
aRTee
Discussion and feedback
If you want to give me feedback you can get to me via my contact info (link at the top) or in this topic: http://mandrivausers.org/index.php?showtopic=44349. I'll be tracking that topic, so as soon as you add a message I will be notified and read up on your comments. That forum is also great for help in case of problems.
All contents © copyright 2003 - 2007, unless mentioned otherwise, published under the GNU Free Documentation License (FDL) by aRTee. Artwork and CSS don't fall under the FDL, standard copyright applies. Tux image from Larry Ewing. You may use anything published under the FDL on this site freely, as long as you include this copyright notice and a reference to the main address of this site: www.mandrake.tips.4.free.fr.


